How to Make a Train Shaped Piñata for a Birthday Party
There’s something about a piñata that all kids love including my little guy. It’s something they enjoy and are always a smashing hit! #getit So, last year, when I began planning for my son’s birthday party back in March, I knew that there would be a piñata involved! Two years ago, we made a number piñata for his Art Themed Birthday Party. This time, we made a train piñata and I have to say, I really loved how it turned out. It honestly adds so much to the décor and such a great way to add a fun unique touch to his special day. So, today, I am excited to show you how to make a train shaped piñata of your own for your next party!
Let’s get started!
Materials
Cardboard Box
Treats (to fill your piñata)
(*Side note: We used red, white, and blue tissue paper since that is the color theme of my son’s birthday party).
Directions
Step 1
First, take your piece of cardboard box and draw the shape of the piñata you would like. In our case, it was a train, and we chose a simple one to copy that we found online. Then, follow the same process to create a second one so that your train has a front and back side.

Step 2
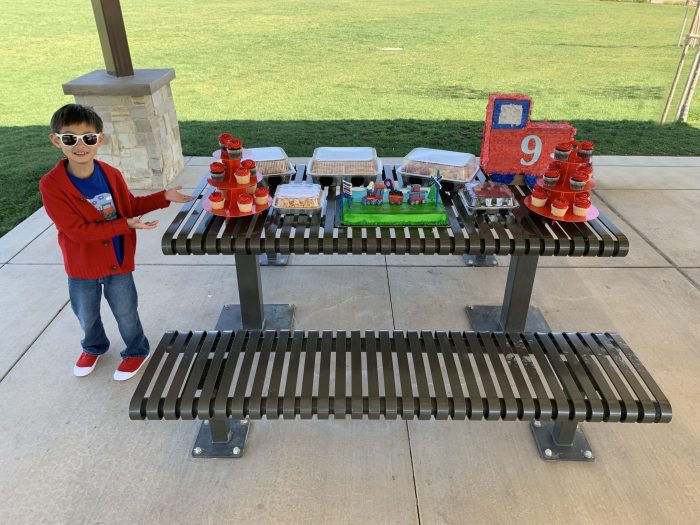
Next, you need to figure out how wide your piñata is going to be. Since our piñata was going to double as a table décor, I wanted to ensure that it was big enough so, we made strips of cardboard 5” wide to go around the shape of the train.

Step 3
Now, cut out your train shape and cardboard strips using a box cutter. From there, you want to punch two holes on the top strip. This is where you will thread a string through.


Step 4
After that, you want to securely shut all the cardboard pieces together using tape except for the front strip. I left this open so that we could fill the piñata later when we are finished making it. Additionally, don’t forget to reinforce the top strip with duct tape since this is the area where the string will hang from. This way your piñata will hold up long enough so that all the kids at your party have a chance to hit it! That said, bring a string* through and tie a secure knot on the top to create a loop for hanging.
(*Side note: I was asleep at the wheel and made an error of using a string instead of a rope with our train piñata. As a result, the piñata fell to the ground a few times. Fortunately, it did not break. But learn from my mistake and make sure to use a rope!)


Step 5
At this point, it’s time to start cutting lengths of tissue paper that are about 2” wide. Then, to create the fringe, I cut small slits at the bottom.


Step 6
Now it’s time to glue it on the piñata!
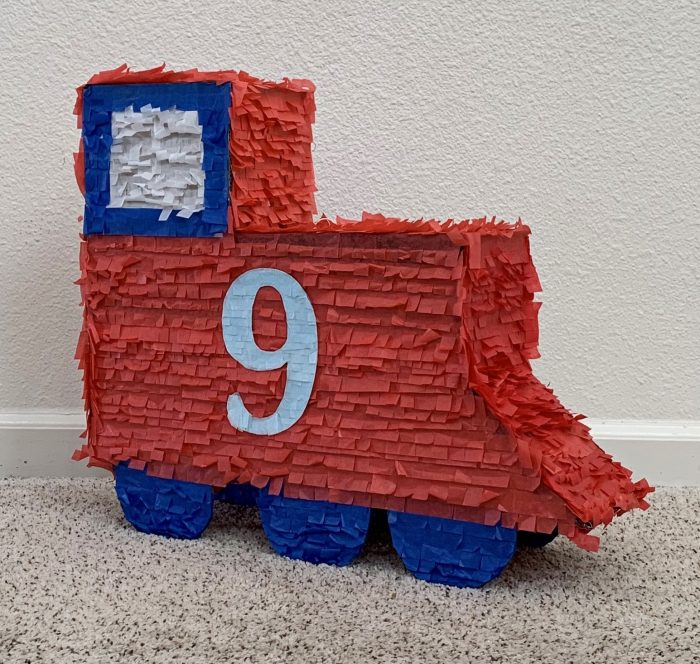
Starting at the bottom, start layering the blue tissue paper to the wheels of the train piñata. Once you reach the body of the train, start layering the red tissue paper. Then, at the top section of the piñata, create a window by gluing white strips of tissue paper. Afterward, attach blue tissue paper on the outer portion to add the trim of the window.
(*Side note: Once your train piñata is fully covered in fringed tissue paper strips, you can decorate it the way you want. I wanted to highlight how old my son was turning so I decorated ours with the number 9.)


Step 7
Lastly, fill your train piñata with goodies! We filled ours with candy and small toys that my son picked out. Then seal down with tape until secure and cover any gaps with tissue paper. Voila – you are done!
Do you piñata?
*Disclosure: This post contains affiliate links. If you click through and make a purchase, I may receive a commission (at no additional cost to you).
**Additionally, some items linked above are not the exact item shown because it is either old or sold out, but I linked similar items for those that are unavailable.
Yonca Nihal | 29th Mar 26
Such a great DIY idea! It actually looks pretty easy to make.
Prajakta | 26th Mar 24
I never knew making a pinata was so easy. The way you have given step-by-step instructions makes it easy to follow.
vidya | 19th Mar 24
wow! Maureen, your detailed step by step instructions and that amazing finished train pinata tempt me to go and make one simply because!!!
Aditi Malhotra | 19th Mar 24
This looks amazing.. how creative of you to make that.. 🙂
Ashley | 17th Mar 24
Omg, you are so crafty! This pinata turned out amazing!
-Ashley
Le Stylo Rouge
NancyC | 16th Mar 24
What a fun and creative idea! I love this Train Piñata! 🙂
Nikki Wayne | 9th Mar 24
This is very nice and I salute you for having a material that are recyclable. It turns so beautiful.
Monidipa | 8th Mar 24
Wow, what a fantastic guide! I love the idea of making a train-shaped piñata, especially with the added personal touch of incorporating your son’s birthday theme into the design. The step-by-step instructions are clear and easy to follow, making it seem like a fun project for both adults and kids alike.
Using cardboard boxes and tissue paper is a brilliant way to create something visually appealing without breaking the bank. And the tip about using rope instead of string for hanging is definitely something I’ll keep in mind to ensure the piñata stays intact during the party!
The photos included really help visualize each step, making it even more accessible for someone like me who might be new to crafting piñatas. Plus, filling it with candies and toys adds an extra element of excitement for the little ones.
Overall, this tutorial has me feeling inspired to try making a themed piñata for my next celebration. Thanks for sharing such a creative and detailed guide!
Olga | 6th Mar 24
This pinata is so cute! My son’s birthday is in one month and I’ll make this train pinata. Thank you for the idea!
pedja | 6th Mar 24
How interesting and easy to make. My wife did superman once and it turned out great. Thanks for sharing!
Marysa | 5th Mar 24
That is adorable! We made a pinata once, and it took a while, but it wasn’t too hard. Such a great idea if you are making personalized party decor!
Renata Feyen | 5th Mar 24
I have seen a few of them, but never tried to make one myself. It doesn’t seem too hard.
Richard Lowe | 5th Mar 24
when I was a kid, I would have loved this. I only used a pinata a few times, and it was a blast each time. Thanks for showing how to make one.
knycx journeying | 5th Mar 24
A wonderful step-by-step guide and all my kids love trains!!! of course, if would be so much more exciting with candies with the train so I am taking note for our next children’s party 🙂
Melanie W | 5th Mar 24
Brilliant this is ace. I love how you have done this and with simple step by step instructions too. Very useful xx
LisaLisa | 5th Mar 24
I LOVE this! My nephew loves trains and this train pinata would be perfect for his birth in April. Thanks for sharing this step by step.
mireille | 5th Mar 24
I am always so impressed with your creativity: your creations always look like a success! This train pinata is pretty awesome!
http://www.chezmireillefashiontravelmom.com
Kathrine Eldridge | 5th Mar 24
Thanks for sharing this fun DIY! Love how it turned out. I would have loved to make this for my sons’ birthday parties!
https://www.kathrineeldridge.com
Sonia Seivwright | 5th Mar 24
Thank you for this tutorial. Its nice to get creative and I found that using Cardboard is a very easy way to get creative.
Kimberley Asante | 4th Mar 24
Your tutorial on how to make a train-shaped piñata for a birthday party is simply delightful! The step-by-step instructions and accompanying photos make it easy to follow along and create this adorable party decoration. It’s such a creative and fun way to add a personalized touch to a birthday celebration, and I can imagine kids (and adults!) having a blast trying to break it open to reveal the treats inside. Thank you for sharing this wonderful DIY project – it’s sure to bring joy to any party-goer lucky enough to experience it!
Stephanie | 4th Mar 24
This is such a clever pinata design! Thank you for the step-by-step instructions – I would like trying this for my son’s next birthday celebration.
Beth | 4th Mar 24
I love this train so much! It’s adorable, and it’s easy to make. That’s a great combo for me. I think this is perfect for an upcoming birthday party I have.
Emily | 4th Mar 24
This is so cool! I never thought to make my own piñata for a party, but it’s such a great idea! My niece’s first birthday is coming up, so I can totally make one for the birthday party.